The Surprise!
- Paige Barrera
- Apr 7, 2017
- 5 min read

So this week in my Wednesday News post I mentioned a surprise! And this post is it!
I went to Dallas Fan Expo over the weekend and I was struck with an idea. Actually, my fabulous hubs, who knows the deepest little desires of my heart, suggested this idea. Are you dying to know what it is??
I’m making custom armor! And not just any armor, but armor based on characters from the sequel to Return to Royalty!
As you guys know by now, I’m a very visual person. I like to have things to look at when I’m thinking about my story. So making armor only made sense, and why not make armor that I can wear to future comic cons?
So the first step was to find a how-to because, let’s face it, I have no idea what I’m doing when it comes to most things. I found The Evil Ted Channel and this video that talks about making foam armor. So I went through my kitchen cabinets and hit the dollar store, Lowe’s and Five Below. $30 later, I had all the pieces I needed to get started!

Things you need:
Duct tape, foil, parchment paper (or butcher paper), a box cutter, an X-acto knife, a black Sharpie, glue, a cutting board, and the foam. The hair dryer is to heat the pieces to make them curve, but a heat gun is much better. It worked for the most part (and I didn’t want to spend $$ on a heat gun) but I think higher heat would have been better.
Step 1:

Make your head form!
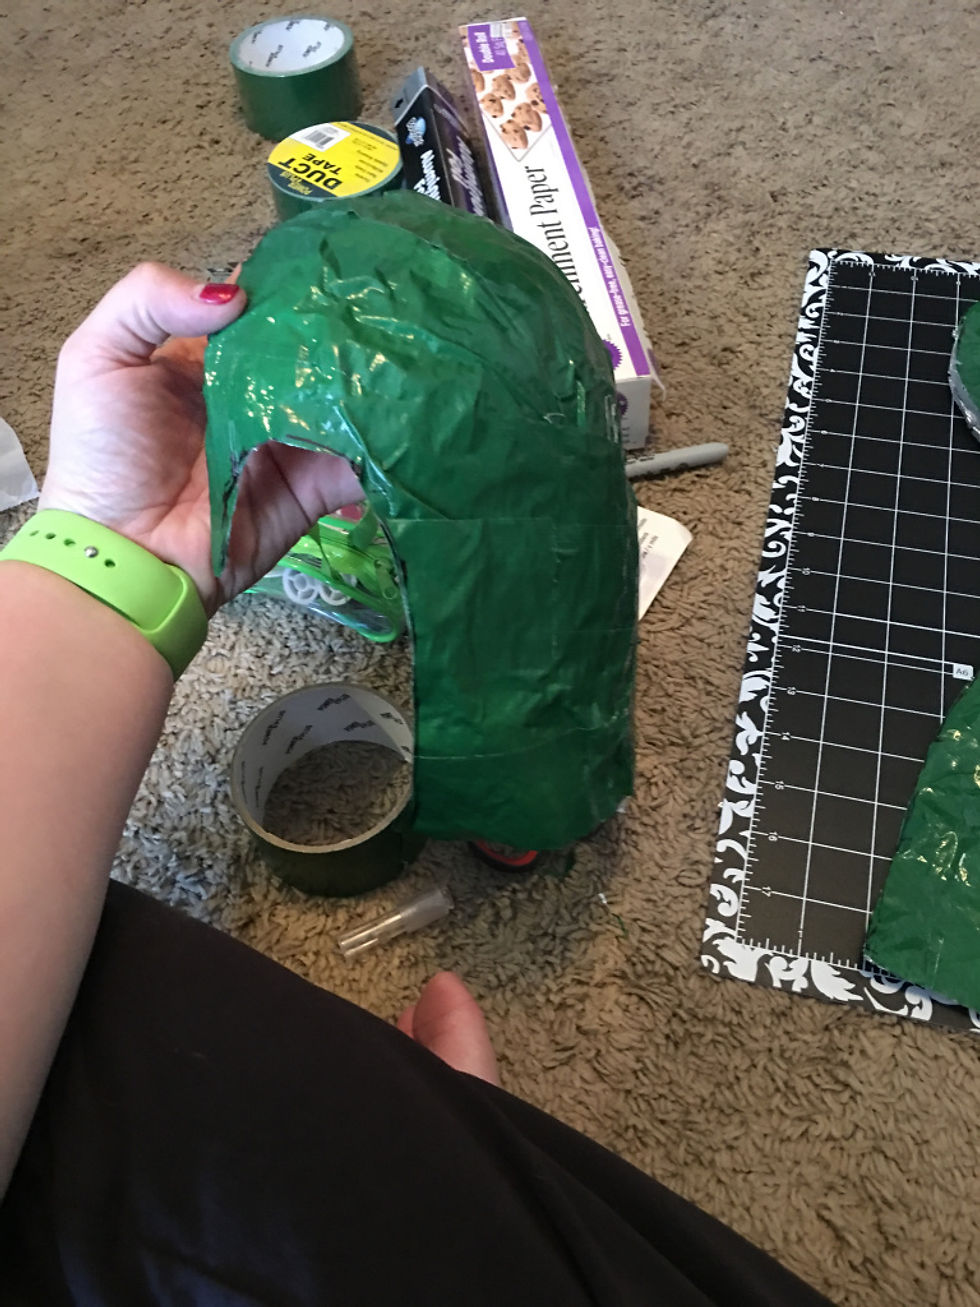
So ideally you want one of these, but I didn’t have one, so I used my own head. It was fine, but I definitely needed an extra set of hands. You want to use the foil to coat your head/plastic head form so that when you put your duct tape over it the duct tape doesn’t stick to anything other than the foil. This is important because this is going to be your pattern and you need to be able to lift it off easily.

You want to make sure your tape is fairly smooth, and you don’t want to use too many layers of tape or foil because you’re going to have to cut it. This was the part where I definitely could have used another set of eyes. Since the form needed to wrap around my whole head, I couldn’t really see what I was doing.

Finally, it was done! Be sure you draw your face-hole shape. Getting the nose part to line up with my nose was tricky because I had to form the foil to my face and slip the mold off and hope I drew my lines in the right place. I highly recommend a plastic head form or borrow your friend’s head. Make sure you can see what you’re doing.

Mine came out a little pointy-er on the crown, but I attribute that to my hair. Also, I couldn’t see what I was doing… 🙂

This is just a shot of the inside so you can get an idea of the foil with the tape on top.
Step 2:


Start cutting! Cut out your face hole. Make sure your pieces line up where they’re supposed to.
You want to draw your cut lines before you start cutting. Make your first one down the middle, and make your second one down the middle of the eyehole area. That was the easiest way.

You should have pieces that look similar to this. You can cut both sides if you want to, but I only used half of my pattern. For the reverse side, I just flipped the pieces over. In the video it suggests that you make tick marks so that you can make sure your pieces are lined up straight. I did this, but every time I transferred it, the tick marks got off. So by the time I reach the end, the marks didn’t line up. It wasn’t that big of a deal for this project, but I can see where it would be for more complex projects.

This part is important. Make your pattern as flat as you can. Because your round piece has to accommodate your ear, you need to make sure you cut it to allow extra room. The video explains this a bit better. You can kinda see the cut I made there in the middle.
Step 3:

Transfer your pattern to your parchment paper. This is so that you can easily trace it onto your foam. You don’t necessarily have to do this, but it certainly makes getting it on the foam easier. Don’t forget you can turn the pieces over to make the other side of the helmet. I also labeled the pieces so that I could remember if they were left or right side and which part was the top and which was the bottom.

Once you’ve transferred the pattern to your parchment paper, cut out your new pattern. Use pins to hold the parchment paper to the foam and use your black Sharpie to draw the pattern. Then use your box cutter to cut the foam. Remember to hold your blade at a 45-degree angle and use slow, steady strokes to get clean cuts. Also be sure to cut INSIDE the black line. This is where your parchment pattern ended and where the cut needs to be made to keep the correct size.

Once your pieces are cut out, use your hair dryer or heat gun to heat the pieces and curve them. They should look the way they will look when the helmet is on your head, and the curving will make it much easier to glue the pieces together.
Side note: Ted recommends contact cement in his video. I thought I could get away with the Goop, but that did not hold at all. Then I went to super glue. That was messy and didn’t hold either. Finally, I accepted that Ted knows what he’s talking about and went to Lowe’s and bought DAP Weldwood contact cement. It was in the paint section with the super glue. You have to allow it to dry for 3-5 minutes for it to become sticky, but once it’s ready that stuff STICKS. Be sure your pieces are lined up right before you press them together.
When putting the pieces together, you have to press firmly and slowly. You want to make sure your curves are correct and that your seams are lined up on the outside of the helmet. This is important for smooth lines when you’re ready to paint your armor!

Five hours later and $30 later, this is the result! Not too shabby for a first attempt! Now all I need to do is fill the seams and make them smooth and add some paint!
Ted has a ton of videos on how to do all these things, and his instructions are so easy to follow. I highly recommend watching his video first and then go! I’ll keep you guys updated as I attempt to finish the armor 🙂


Comments